I originally made this purse for my grandmother. After I finished it, I was wishing I had one for myself too. The size is perfect for carrying sunscreen, a book, and other things you may need for the beach or pool (or for running around town for that matter!). I love that it's not enormous like the other beach bags I have. Here are the instructions for making your own if you'd like.
*I used quilting cotton for the outside and lining. I used Pellon 809 Decor Bond for the interfacing.
Note: I used a 1/4" inseam because that's what I'm used to as a quilter, but it would also be great using a 1/2" inseam. Just increase the fabric rectangle sizes by 1/4" on all sides to make the same size purse I made.
For all topstitching, I used a 4.0 stitch length and stitched very close to the edge.
1- Cut out all the pieces you'll need for your purse:
2 10 3/4" x 12" rectangles of outside fabric
1 3" x 42" strip outside fabric for strap (or 3" x width of fabric with selvedges trimmed for most quilting cotton)
2 10 1/2" x 12" rectangles of lining fabric
1 10 1/2" square of lining fabric for pocket
2 10 3/4" x 12" rectangles of interfacing
 |
| Outside, lining, interfacing, strap |
 |
| Pocket, Velcro |
2- Fuse the interfacing to each of the outside fabric panels according to manufacturer's instructions.
Fold the 10 1/2" square in half, right sides together.
Sew the open end of the long side, and turn the pocket right sides out. Press the pocket and topstitch on the folded long side.
Place the pocket on one of the lining fabric pieces. Your pocket should be oriented so that the raw edges of the pocket line up with the edges of the lining fabric. Try to center the pocket on your lining fabric. I just looked at it, no measuring required. :)
The topstitching should be pointing toward what will become the top of your purse. Pin the pocket in place, and topstitch over the bottom of the pocket. Then, stitch a vertical line over the pocket, dividing it into two sections. Be sure to backstitch at the top and bottom. I made one large and one small pocket by stitching 4" from one edge.
Fold each lining piece in half lengthwise. Crease it with your finger. Do the same with both parts of Velcro. Align the folds of one lining piece and one Velcro piece, and pin the Velcro about 1" below the top of the lining fabric. Stitch around the edges of your Velcro.
6- Sew the interfaced outside pieces together.
Place the outside fabrics right sides together, and stitch down one long side, across the bottom, and up the other long side. Leave the top open.
7- Sew the lining pieces together.
Repeat step 6 with the lining fabrics.
8- Box the corners of the lining and the outside pieces.
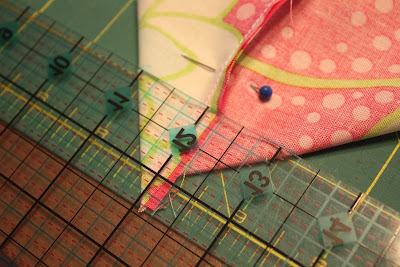
Stand the unit upright (open side up), align the side and bottom seams, and flatten the corner, forming a triangle. Measure 1" from the tip, and draw a line from side to side.
Be sure to pin above the marked line. Stitch on top of the line.
Trim the corner to a 1/4" inseam.
Repeat with the rest of the bottom corners.
Fold and press your strip in half lengthwise.
Open it up, and fold one side almost up to the crease. Press the new fold in place.
Repeat with the other side.
Now fold your strap along the original crease. Pin in place.
Topstitch along the open side first, and then along the folded side.
10- Attach the outside of the purse and the strap to the lining.
Leave the outside of the purse inside out. Flatten the strap and hold each end so that it doesn't twist in the middle. Place the strip inside the purse, and pin strap ends to the sides, centering each side of the strap on a side seam. The raw edge should stick over the top of the purse 1/4" - 1/2."
Turn the lining fabric right sides out and place it inside the other part of the purse (still inside out). The right sides of each part should be facing the right sides of the other part. Pin the lining in place. Be sure to remove the pins through the straps and pin through all three pieces (outside, strap and lining).
Sew around the top of the purse, leaving a 4" or 5" gap for turning. Backstitch on either side of the gap.
11- Turn the purse right sides out.
Reach through the hole and pull the purse through until the right sides are all out. Push the lining inside the purse, and press around the top. Be sure to tuck in the raw edges of the gap used for turning as you press.
12- Topstitch around the top of the purse, ensuring that you close the gap used for turning.
That's it! It's a pretty simple method that you can use for any size tote bag. I hope you enjoy your beach purse as much as I do!


