Wednesday, March 31, 2010

Wip Wednesday 2

So, this is actually more like a triumphant-completed post, rather than a work-in-progress post, but oh well! I've been so very busy the past few weeks with one very large WIP...Danielle's queen size quilt. I almost can't believe I did it. I thought my hair would turn gray before I finished it, but it didn't (at least not that I can see). I also made a triangle quilt from the lovely pile of scraps I had left over. So, here they are!

Danielle's Quilt
Unfortunately, I let this one get away from me without taking good pictures of it first. I was way too anxious to send it to its new home. I hope Danielle loves it as much as I do!

Triangle Quilt

Pieced Back
This one is quilted in double straight lines on the diagonal, which gives it a lot of interest. It measures 37"x48". This triangle quilt is for sale in my Etsy shop.

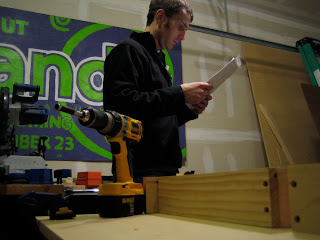
I do have one WIP for this week, but it has more to do with my husband than myself. He is building me a craft table, so I don't have to use our kitchen table for sewing anymore! He's almost done, but unfortunately it has to be painted before I can use it...and I like sewing a whole lot more than painting! Happy Wednesday!

Wednesday, March 17, 2010

WIP Wednesday

I happen to be slightly obsessed with birds right now. I'm really not sure why, except for the fact that they are so cute! So, today's work in progress is all about little birdies! Right now, I am trying to find/create a pattern I like to make some bird softies for several different uses. Here are my first two attempts.

This one is made from a pattern in the book Last-Minute Patchwork + Quilted Gifts by Joelle Hoverson (which I highly recommend). It is very simple, which makes it quite charming.
The one with the tail comes from a pattern on spoolsewing.com. I'm not sure if I messed something up, but it seems to have an extremely curved beak.
So, next time, I think I'll try drawing my own pattern. Do you ever draw your own patterns?

Monday, March 15, 2010

Scrap Pile


The custom quilt I'm working on now has the most lovely diamond patterned blocks (tutorial to come later). These diamond blocks each make eight triangle scraps...

...which I have now chain pieced into half-triangle squares.

How do you use your scraps?

Wednesday, March 10, 2010

WIP Wednesday

Remember my stash from Sunday? Well, it's slowly but surely becoming the quilt it was meant to be! Here's a sneak peak...
Since it is a gift, I can't show any more pictures until it has gone to be with its new owner. It has left me with an unexpected and amazing pile of scraps! I have big plans for this little pile, but for now, I have to finish the task at hand.

Sunday, March 7, 2010

Sunday Stash 1

Yesterday, the most amazing package arrived in my mailbox from Hawthorne Threads! If you like to order your fabric, I highly recommend this shop! The prices are very competitive, and the more you order, the cheaper your price per yard! How fun (and slightly dangerous) is that?! I'm using these fabrics in a custom shabby chic-inspired quilt. I'm so in love! This one is going to be hard to give away...
This quilt will feature fabrics by Amy Butler, Joel Dewberry, Anna Griffin, Heather Bailey, and Patricia Bravo. And since I should be cutting my fabric instead of sitting at the computer, I'll just highlight my favorite fabric from the group. It's called "Scattered Lantern Pods" by Laura Gunn for Michael Miller. So cute! I hope you had a wonderful weekend!

Friday, March 5, 2010

Pretty Patchwork Quilt

Sometimes, the simplest of patterns are the most pleasing. This quilt features fabrics by Moda, Amy Butler, and Michael Miller. The fussy-cut birds are my favorite part!
I used free-motion loops for the quilting, and it looks so pretty! I finally branched out from the straight lines and stippling that I normally use, and I am so glad I did!
SOLD

Thursday, March 4, 2010

Pinwheel Quilt Block Tutorial

I am so in love with this precious little quilt! The pinwheel blocks used to construct this quilt are just so adorable, don't you think?!

This quilt is now on sale in my Etsy Shop.

Do you want to make your own pinwheel quilt?? Here's how I did it...

Begin with two fabrics that compliment each other well, and cut each fabric into strips of equal size from selvage to selvage. Now, some people like to lay the fabric out to cut it, but to save time, I like to fold my fabric with the selvages meeting, then fold the creased edge up to meet the selvages as well. Then, use a rotary cutter, quilting ruler, and self-healing mat to cut your strips. I cut mine into 6" strips for the quilt above, but the quilt pictured below used 5.5" strips. Trim the selvages.

Lay out your strips right sides together.

Using a pencil, draw one line perpendicular to the cut edges the same distance as the width of your strips. If you cut 5.5" strips, your perpendicular line should be 5.5" away from the edge (which creates a square).

Draw another perpendicular line the same distance from your first line as the width of you strip. Continue until you have the desired number of squares. Each quilt block requires 4 squares.

Draw a diagonal line from the top of the first perpendicular line to the bottom of the second perpendicular line.
Now draw a line to connect the bottom of the second line to the top of the third line, and so on. I like to go back and pin where there are no diagonal lines, but that is up to you...

Using a 1/4" inseam (I use a 1/4" presser foot on my machine...it didn't come with my machine, so I bought one), sew on one side of your diagonal lines. Don't cut your thread until you get to the end. Simply raise the presser foot and rotate your fabric. When you have to make the turn inside the fabric, leave your needle down on the perpendicular pencil line and only raise the presser foot.

Then repeat on the other side of the diagonal lines. You should get something that looks like this...

Now cut your fabric on the pencil lines. Press your seams open toward the darker fabric.

Trim the tails and make sure your blocks are square using your ruler or a quilter's square.

Arrange your blocks so that the colors create a pinwheel. Notice the top row and the bottom row...

Sew the blocks in the top row together using a 1/4" inseam. Do the same for the bottom row. Press your new seams toward the dark.

Now, sandwich the two together. I only pin blocks that have seams when I'm quilting. I put one pin right through each seam I'm going to sew about 1/4" down.


Sew them together, and press the new seam open.

Now, pat yourself on the back, because you've just made the cutest pinwheel quilt block!

Post a comment here or email me if you have any questions! I'd love to help!