Showing posts with label tutorials. Show all posts

Tuesday, February 15, 2011

Lovely Pot Holders Tutorial

Lovely Potholders

Materials:
3 fat quarters of coordinating fabric (approx. 18" x 20" each)
18" x 20" piece of cotton batting or scraps to fit pattern (I used Warm & White)
18" x 20" piece of Insul~Bright or scraps to fit pattern
1 sheet of paper for pattern

Other supplies:
Walking foot and denim needle for sewing machine
Pins for basting
Quilting ruler
Fabric marker

Note: This tutorial is for two pot holders.

1. Fold paper and cut out a heart following the measurements in the picture.  It's important not to make the "dip" in the middle too steep.

2.  Fold the point up and crease.


3.  Cut two half hearts and two full hearts from each material (TWO of the fat quarters- one for the outside and one for the lining, batting, and Insul~Bright).

Materials shown in the picture are enough to make ONE pot holder.
4.  Draw lines for quilting on your outside fabric for both pot holders.  I made a 1" grid pattern using my quilting ruler.


Use the lines from the front piece to mark the back piece.
5. Layer one full heart in this order: lining fabric right side down, batting, Insul~Bright, top fabric right side up.


6. Pin and quilt.


First, I quilted one line in each direction in the center to secure the pot holder. 
 Once you've finished quilting, trim the excess batting from the heart.  


7. Layer and quilt the half heart.  Trim the excess.

Repeat steps 6 & 7 with the other pot holder.


8.  Prepare binding from your third fat quarter.  I used 2.5" strips to make mine.  If you're not a quilter, this is an excellent tutorial from Crazy Mom Quilts on how to prepare and attach binding.  This is a great binding reference from Martha Stewart as well.  I finished my binding with the Overlap Finish, as she calls it.

Unfortunately, this is where I stopped taking pictures.  I guess I just got caught up in the excitement of finishing...

9. Bind only the straight edge of each half heart.  Trim the excess binding.  Do not worry about finishing the edges.  We'll cover them later.

10.  Place one half heart and one full heart together, lining fabrics together.  Topstitch around the edges using a 1/8" inseam if you can to attach the half heart to the full heart and secure the edges.  Repeat.

11. Attach your binding to each pot holder.  Miter the corners at the dip and point of each heart.


And there you have it!  Enjoy!

Monday, February 7, 2011

Burp Cloth Tutorial

Burp Cloth Tutorial

Materials:
 2 20" x 14" birdseye 3-ply cloth diapers* 
2 20" x 5" strips of cotton fabric (pieced or whole)
coordinating all-purpose thread

*I found mine in the baby section at Walmart.
 Note:  You are basically going to make a tube out of your fabric and diaper and close it much like the Baby Blanket I posted the other day. 

Use a 1/2" inseam.

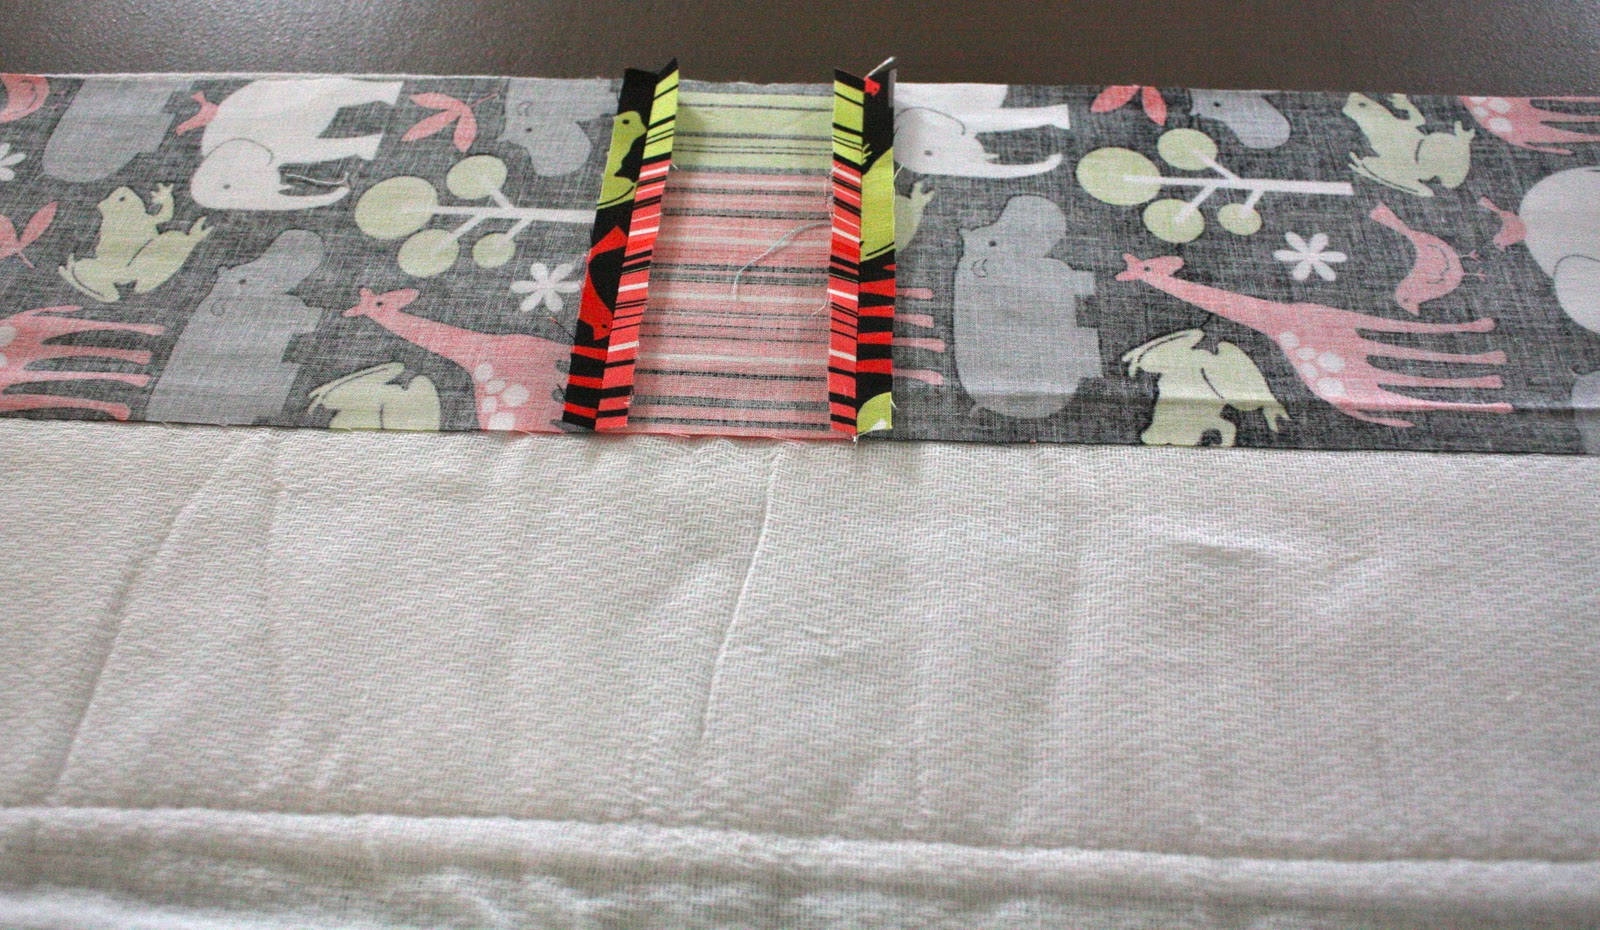
1.  Lay your fabric strip right side down on top of your diaper, and align the edges.  Sew them together on the aligned edge.


2.  Now line up the other two long edges, keeping the cotton fabric right side down.  Sew that side together just like you did in step 1.


It should look like an open-ended tube when you hold it up (shown below).


3.  Lay your tube out and center the fabric strip.  You should have the same amount of white on either side.


Press your seams in toward the fabric strip.


4.  Sew one side of your tube completely closed (shown below).  Sew the other side the same way, but leave a 4" gap in the middle of your seam for turning.  Be sure to backstitch on either side of your opening to strengthen it for turning.


5.  Turn your burp cloth right sides out and tuck in the edges of your opening.

6.  Topstitch around the fabric strip in the middle about 1/4" away from each seam.  Be sure that your stitches close the opening you left for turning.

Note: When your needle comes 1/4" from each corner, leave it in the down position, raise your presser foot, and rotate the cloth counter clockwise.  Continue stitching.


And there you have it!  Super simple and super cute, too!  Enjoy!  

If you make some, let me know!  I'd love to see pictures!

Wednesday, August 25, 2010

Printable Mailer

Yesterday, I returned my August block to Karen for our Fresh and Funky Quilting Bee.  I really enjoyed the freedom in piecing this block.  Thanks for a fun assignment, Karen!
I didn't have anything to mail my block in, so I decided to make a mailer myself.  I traced a used mailer on card stock, cut out the pieces and stitched them together.  Sounds good, right?  

Then today, I thought about how great it would have looked with a little embellishment!  Well, it's too late for my August block, but maybe you can make use of it!

Here is the finished product:

Paper Airplane Mailer


1. Print my images or your own on cardstock. 
{Idea: It would be really cute to have your kids draw pictures on the cardstock instead of printing something out...if you have kids, that is.}

2. Cut out on the dotted lines, then place your cards wrong sides together, aligning the straight sides.

3. Stitch around the edges with a scant 1/4" seam allowance (if you can call it a seam allowance...).  I set my stitch length at 4.0.

Ta-da!  So easy!!

**If you use my images, please reserve them for private use only.  Thanks!