Friday, February 25, 2011

Circles!

I have wanted to make a quilt with circles on it...probably since the day I decided I wanted to learn to quilt.  I've learned about raw edge applique.  I used that technique to humiliate my mom's dachshunds. :)

However, I also wanted to know an easy way to actually piece circles into my quilts.  I think I've just found my method of choice!  If you are curious about circles (like me), go check out this video!  Dale Fleming is the talented mind behind such an excellent trick.  I'm seeing circles in my near future!!  

Saturday, February 19, 2011

Fresh & Funky February

This month, Julie of Forest Poppy asked for blocks with a tree or leaf theme.  She sent some really beautiful fabrics with bold colors and said that she was open to pretty much anything, including embroidery.  As soon as I read that, the idea for my block popped into my head.

I love embroidery.  I think that almost any picture can look beautiful when drawn with thread on fabric.  I did most of it by hand.  I decided that I wanted a very thin outline on my little fox and bird, so I used my machine and darning foot.  I like the organic look of the stitches very much.


If you don't know much about embroidery, you should check out Doodle Stitching by Aimee Ray.  That's what I did! :)  If you don't want to get the book, she does have some tips on her blog.  Or, there are about a million other videos and tutorials on the internet, so just do some digging.


Like I said before, I believe that almost any drawing looks beautiful when it's embroidered, but in case you'd like to use my drawing, I've posted it below.  This is for personal use only.  You should be able to click on it to enlarge it and then print or trace it from there.  

I hope you have a great weekend!

Tuesday, February 15, 2011

Lovely Pot Holders Tutorial

Lovely Potholders

Materials:
3 fat quarters of coordinating fabric (approx. 18" x 20" each)
18" x 20" piece of cotton batting or scraps to fit pattern (I used Warm & White)
18" x 20" piece of Insul~Bright or scraps to fit pattern
1 sheet of paper for pattern

Other supplies:
Walking foot and denim needle for sewing machine
Pins for basting
Quilting ruler
Fabric marker

Note: This tutorial is for two pot holders.

1. Fold paper and cut out a heart following the measurements in the picture.  It's important not to make the "dip" in the middle too steep.

2.  Fold the point up and crease.


3.  Cut two half hearts and two full hearts from each material (TWO of the fat quarters- one for the outside and one for the lining, batting, and Insul~Bright).

Materials shown in the picture are enough to make ONE pot holder.
4.  Draw lines for quilting on your outside fabric for both pot holders.  I made a 1" grid pattern using my quilting ruler.


Use the lines from the front piece to mark the back piece.
5. Layer one full heart in this order: lining fabric right side down, batting, Insul~Bright, top fabric right side up.


6. Pin and quilt.


First, I quilted one line in each direction in the center to secure the pot holder. 
 Once you've finished quilting, trim the excess batting from the heart.  


7. Layer and quilt the half heart.  Trim the excess.

Repeat steps 6 & 7 with the other pot holder.


8.  Prepare binding from your third fat quarter.  I used 2.5" strips to make mine.  If you're not a quilter, this is an excellent tutorial from Crazy Mom Quilts on how to prepare and attach binding.  This is a great binding reference from Martha Stewart as well.  I finished my binding with the Overlap Finish, as she calls it.

Unfortunately, this is where I stopped taking pictures.  I guess I just got caught up in the excitement of finishing...

9. Bind only the straight edge of each half heart.  Trim the excess binding.  Do not worry about finishing the edges.  We'll cover them later.

10.  Place one half heart and one full heart together, lining fabrics together.  Topstitch around the edges using a 1/8" inseam if you can to attach the half heart to the full heart and secure the edges.  Repeat.

11. Attach your binding to each pot holder.  Miter the corners at the dip and point of each heart.


And there you have it!  Enjoy!

Friday, February 11, 2011

Hearts

I don't usually do anything to decorate for Valentine's Day, but this year I've been feeling a little more festive.   I love to bake, so I thought I'd make some heart-shaped potholders.  I think I'll just leave them out on the counter so I can look at them, even when I'm not baking!


 This shape is actually really great for pulling goodies out of the oven...like that cinnamon swirl bread.  Yum!


Original Fabric: Young Love, XOXO, Hearts and Hexies 

Thursday, February 10, 2011

Year of the Rabbit Contest

I decided to enter this week's Fabric of the Week contest on Spoonflower.  There are some amazing designs this week, so head over and check them out if you have time!  If you like my fabric, I'd love to get your vote!  Thanks! :)


Monday, February 7, 2011

Burp Cloth Tutorial

Burp Cloth Tutorial

Materials:
 2 20" x 14" birdseye 3-ply cloth diapers* 
2 20" x 5" strips of cotton fabric (pieced or whole)
coordinating all-purpose thread

*I found mine in the baby section at Walmart.
 Note:  You are basically going to make a tube out of your fabric and diaper and close it much like the Baby Blanket I posted the other day. 

Use a 1/2" inseam.

1.  Lay your fabric strip right side down on top of your diaper, and align the edges.  Sew them together on the aligned edge.


2.  Now line up the other two long edges, keeping the cotton fabric right side down.  Sew that side together just like you did in step 1.


It should look like an open-ended tube when you hold it up (shown below).


3.  Lay your tube out and center the fabric strip.  You should have the same amount of white on either side.


Press your seams in toward the fabric strip.


4.  Sew one side of your tube completely closed (shown below).  Sew the other side the same way, but leave a 4" gap in the middle of your seam for turning.  Be sure to backstitch on either side of your opening to strengthen it for turning.


5.  Turn your burp cloth right sides out and tuck in the edges of your opening.

6.  Topstitch around the fabric strip in the middle about 1/4" away from each seam.  Be sure that your stitches close the opening you left for turning.

Note: When your needle comes 1/4" from each corner, leave it in the down position, raise your presser foot, and rotate the cloth counter clockwise.  Continue stitching.


And there you have it!  Super simple and super cute, too!  Enjoy!  

If you make some, let me know!  I'd love to see pictures!

Saturday, February 5, 2011

Quick Baby Blanket Tutorial

Quick Baby Blanket
Finished size approx. 26.5" square

Materials needed: 
3/8 yd. each of 3 coordinating fabrics (quilting cotton)
7/8 yd. minky or other soft fabric*
Coordinating all-purpose thread
Yarn or embroidery thread (I used DMC Perle 5)
Hand embroidery or upholstery needle
*I find minky to be a bit slippery to sew, so if you are in an extreme hurry you might want to try something like flannel.

**Even Faster Variations:**
-If you're really in a hurry, just use one top fabric and one back fabric (both 7/8 yd.) and trim them into matching squares.  Then, begin with Step 7.
-Try using 3 9.5"x 27.5" strips for the top fabric and begin with Step 5.

-------------------------------------------------


1. Using a quilting ruler, mat, and rotary cutter, cut one strip of each cotton fabric 9.5"x width of fabric.

2. Cut 9.5" squares from each strip.  You can get 4 from each fabric, but you won't need that many.  You will only need 9 squares total. 

 I used a 9.5" quilter's square, but that's not necessary if your cutting mat has measurements on it.
I cut 3 squares of animal fabric, 4 squares of green dots, and 2 squares of stripes. 
 3. Sew your squares together in rows using a 1/4" inseam.  As with any patchwork project, it's really important to have a 1/4" presser foot so that your seams line up perfectly.

4. Once you have 3 rows of 3 squares each sewn together, press your seams.  You can either press them toward the dark fabric or press them like I did- top and bottom rows in one direction and middle row in the opposite direction.


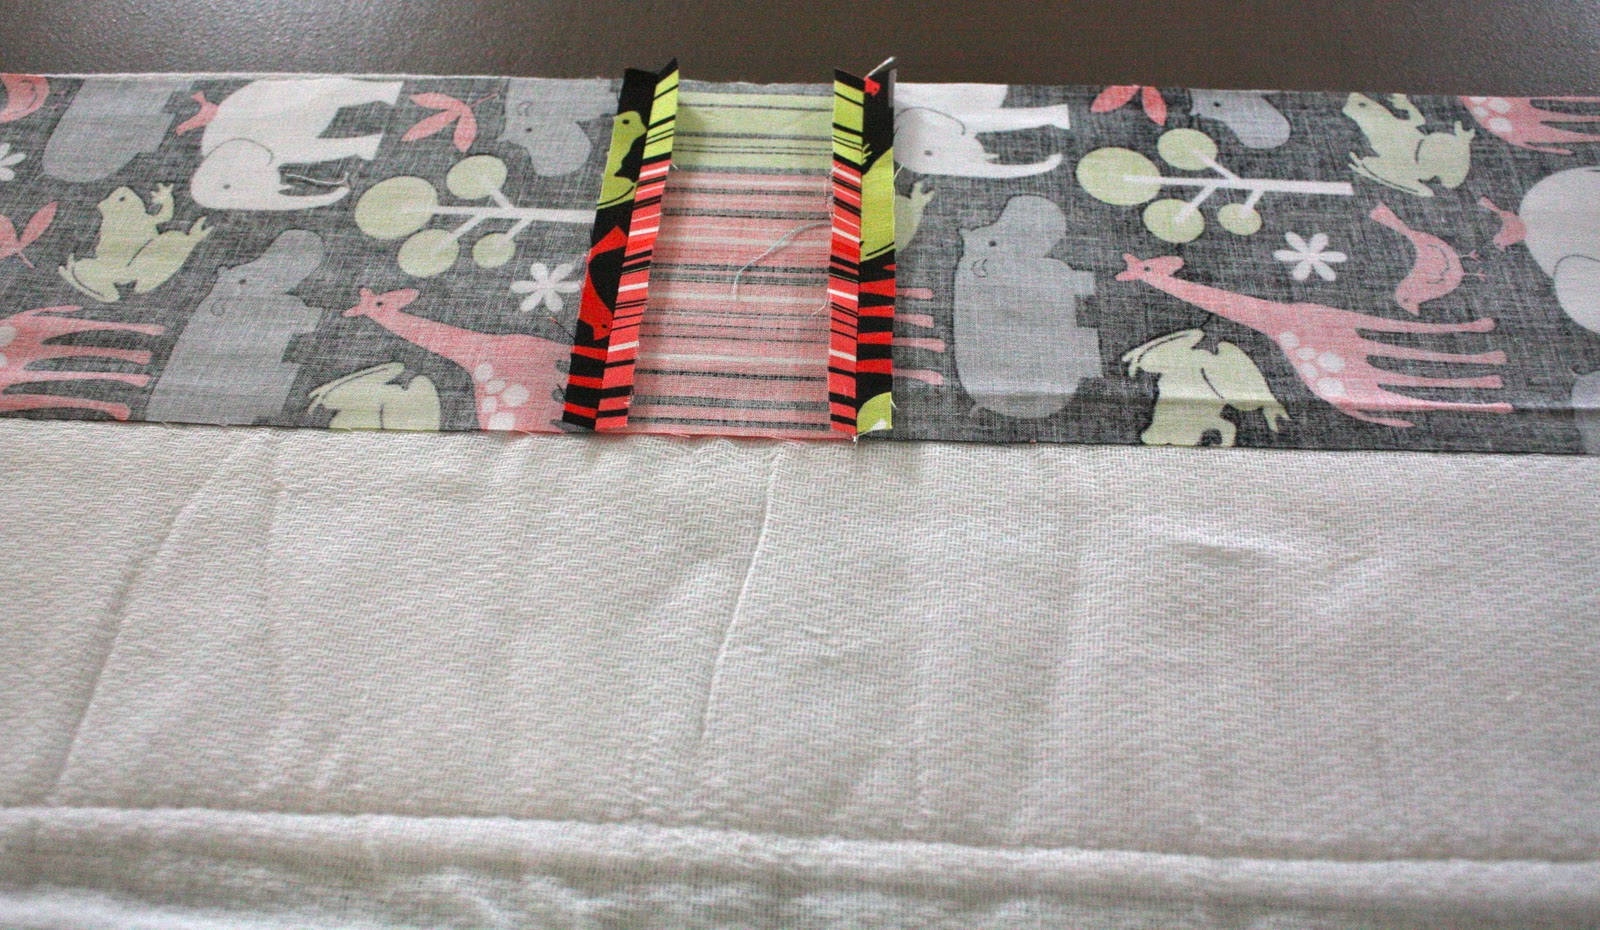
5. Sew rows together to complete blanket top.  

Here are a few tips for pinning your rows together:
Arrange two rows right sides together making sure to align the seams.  Don't worry about the edges too much yet.
Starting with the bottom row, insert your pin into the seam on the wrong side of the fabric about 1/4" from the cut edge (about where your stitches will go when you begin to sew).  Then insert your pin into the seam on the right side of your top row fabric.  When I took my quilting class, my instructor told me to "guess at a quarter inch."
Now press your fabrics together and insert the tip if the pin back through both rows of fabric. 

This method of pinning really helps you to get sharp points without pinning a million times.
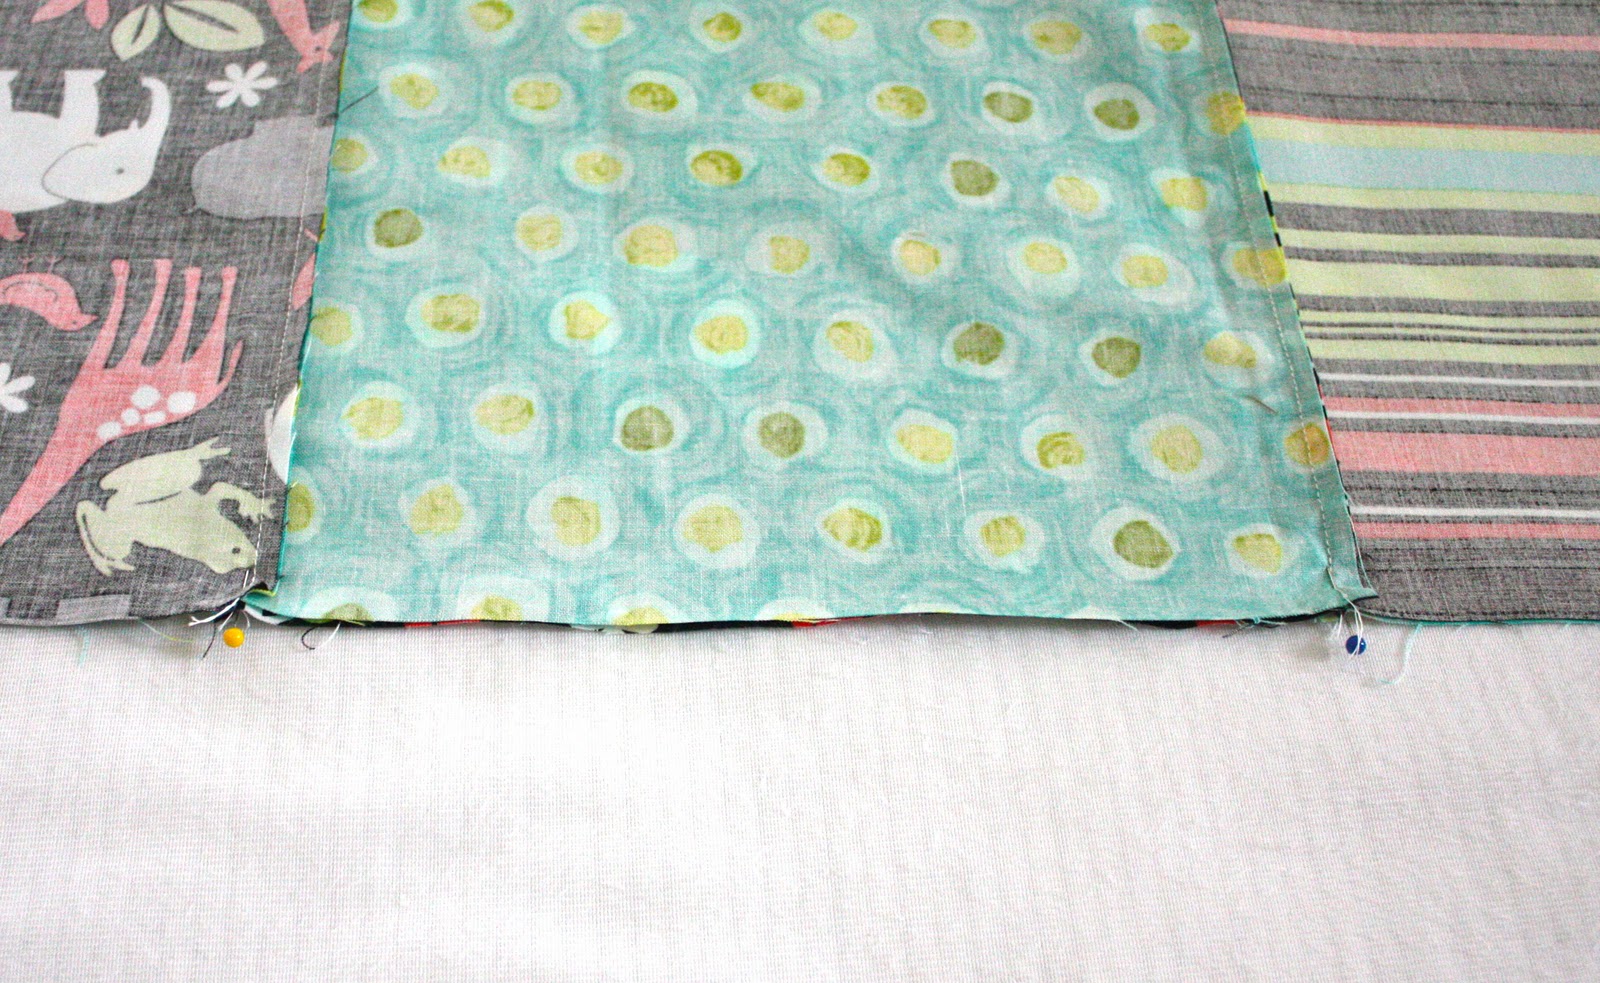
Now line up the edges and sew your seam.  Don't remove the pin until you have caught one of the seam allowances with your needle.
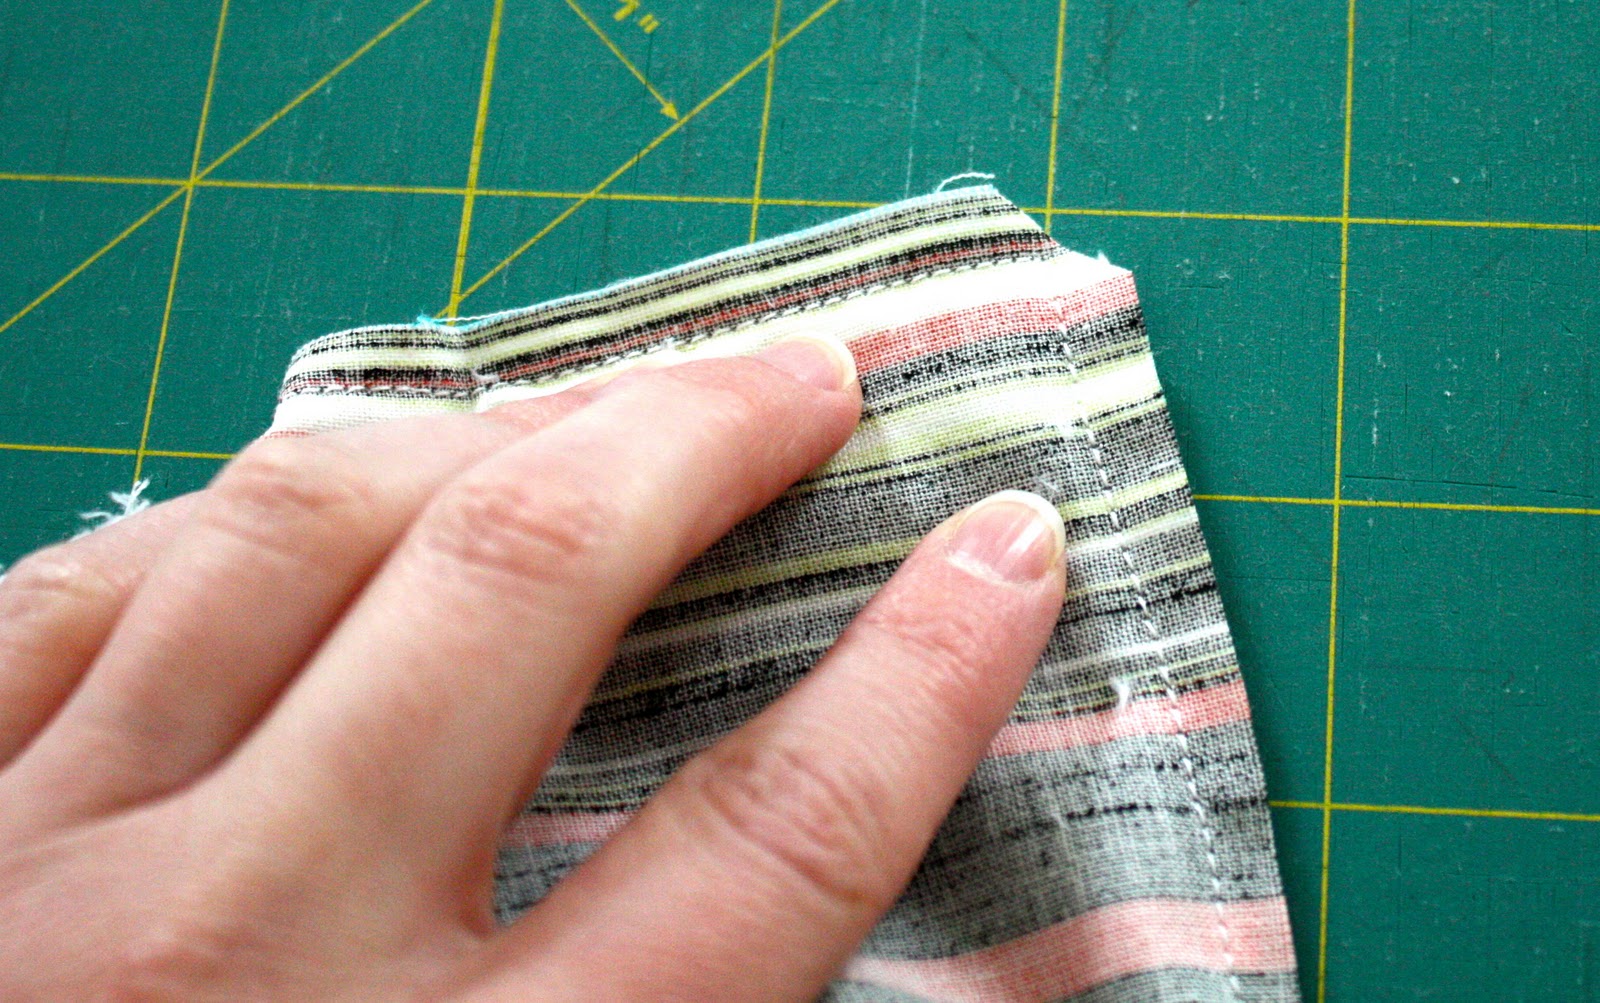
Now press those middle seams open.
And you have a perfect (or nearly perfect) point!
6. Lay your blanket top out in the wrong side of your minky and trace the edges using a ruler and fabric marker, and cut out your blanket back.  I just used scissors.


 7. Position your fabrics right sides together, and pin them in place.  Unlike joining the seams in the top, you'll probably need a fair amount of pins because the minky is so slippery.  Sew your layers together with a 1/2" inseam leaving a 4"-5" opening in one side for turning.  Backstitch on either side of your opening.

A note about turning corners: When your needle is 1/2" from each corner, leave your needle down in the fabric, raise the presser foot, rotate the fabric 90 degrees counter clockwise, and continue sewing.  Use your regular presser foot or a walking foot.  

8. Trim your corners (but do not cut the stitches in the corner) and turn your project right sides out.  Make sure your corners are crisp by using a pointed object like a capped pin, closed scissors, knitting needle, your finger, etc., to push the corners out from the inside.


9. Tuck the edges of your opening in, pin them in place, and top stitch around the edges of your blanket 1/8"-1/4" from the edge.  Make sure your topstitching closes the opening.

10.  You'll need to secure the blanket with ties or a nice satin stitch on your machine.  I used 4 ties, but you can have as many as you like, pretty much anywhere you like.  I made mine tie in the back, but once again, that's up to you.

To make your ties come out in the back, thread your needle and insert in into the back and up through the front in the spot you choose. 


Secure your tie with a surgeon's knot.  Trim to about 1/2" inch.


And that's it!  Now you can use your scraps to make coordinating burp cloths!  Enjoy!

If you make one, let me know!  I'd love to see pictures!